Are you running a promotional event and do you want to share the discount coupon code? Do you want to greet your visitors with a welcome message?
These are the most common reasons for adding an announcement bar also called a notification bar on a website.
These message bars are non-intrusive as they do not hide the entire page content. They share the message you want just by occupying a minimal page area.
In this article, I’ll show you how to add a sticky/floating message bar (notification bar) in WordPress.
What is a Sticky Message bar?
A sticky message bar is a small and wide element that sticks to the top or bottom of a page containing a message/information for the visitor.
You can find these sticky message bars on most websites that offer products to shop for.
These sticky message bars are always visible even the user scrolls the page.
So, they are one simple way to grab the attention of the visitors.

We can also configure a message bar to be not sticky. They do not stick to the window instead, scroll along with the other page contents. You may even prefer this based on your requirement.
Adding a Sticky Message Bar to WordPress
Let’s add this stick message bar using the Announcer WordPress plugin. It is a free and lightweight plugin that offers all the features you need to display a message bar.
The best thing about the Announcer plugin is that, there is no need to Sign-Up, create an account, or any such nonsense.
To get started, you can download and install Announcer from the WordPress admin dashboard.
In your WordPress admin area, head over to Plugins > Add new > Search for “Announcer”
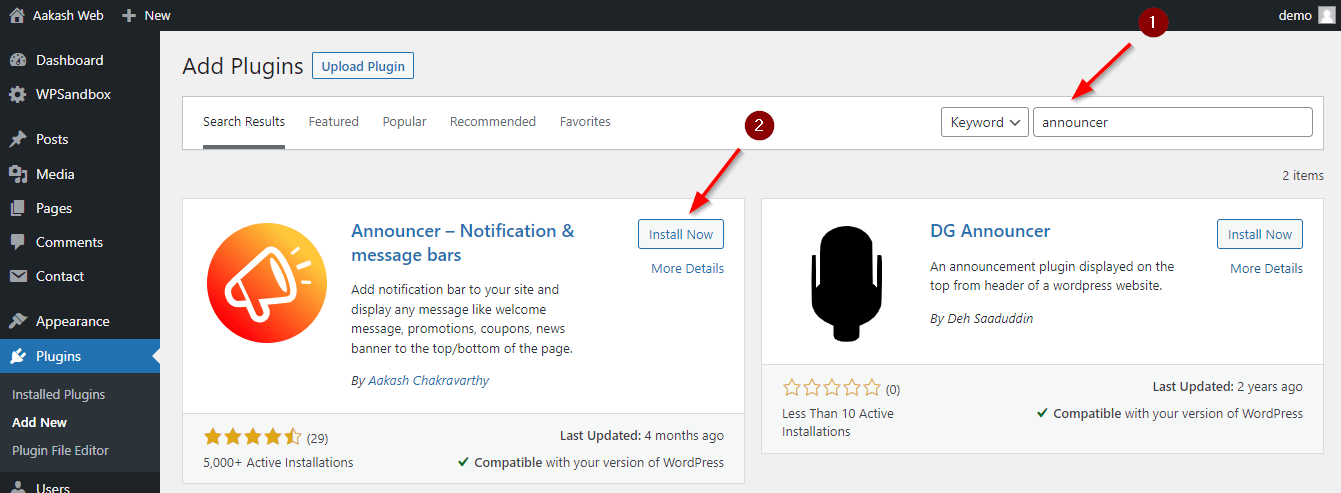
Install and activate the Announcer plugin. You will see the announcer plugin icon in the admin navigation bar.
Go to Announcer > “Add announcement” to add a new announcement bar.
Give a title for the announcement bar for identification. Write the message you would like to convey in the message bar down below.
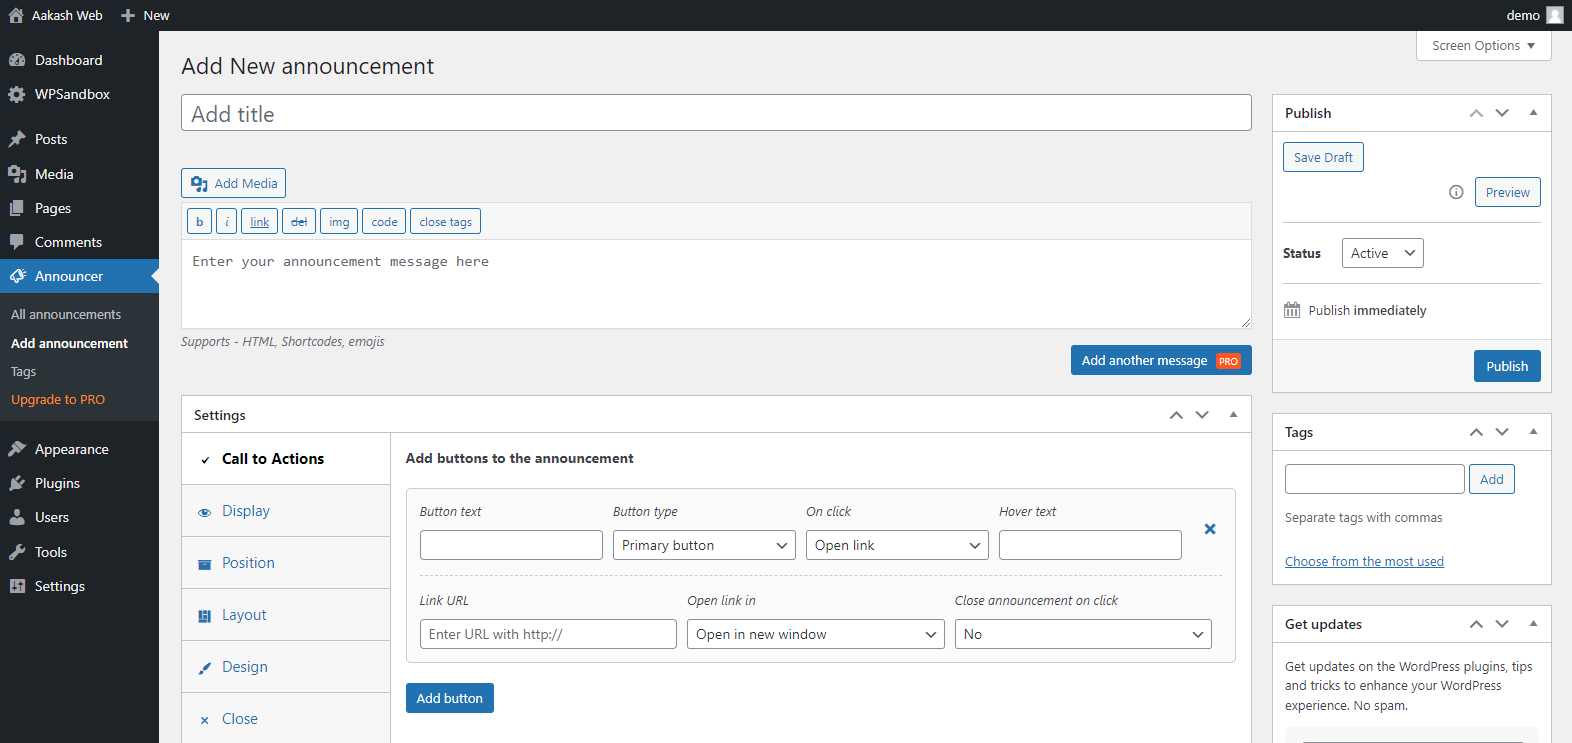
Under the setting section, switch to the “Position” tab. Select “Sticky” to “Yes”. This will set the announcement bar as a floating sticky bar.
You can also choose “No” to disable the sticky bar.
In the same tab, you can select the position of the announcement bar. Select “Top” to show the sticky bar at the top of the page or “Bottom” to show it near the bottom of the page.
The announcement bar added by the Announcer is responsive and works on mobile devices too.
You can style the announcement bar under the “Design” tab as needed.
Hit “Publish” to save the settings and publish your announcement bar.
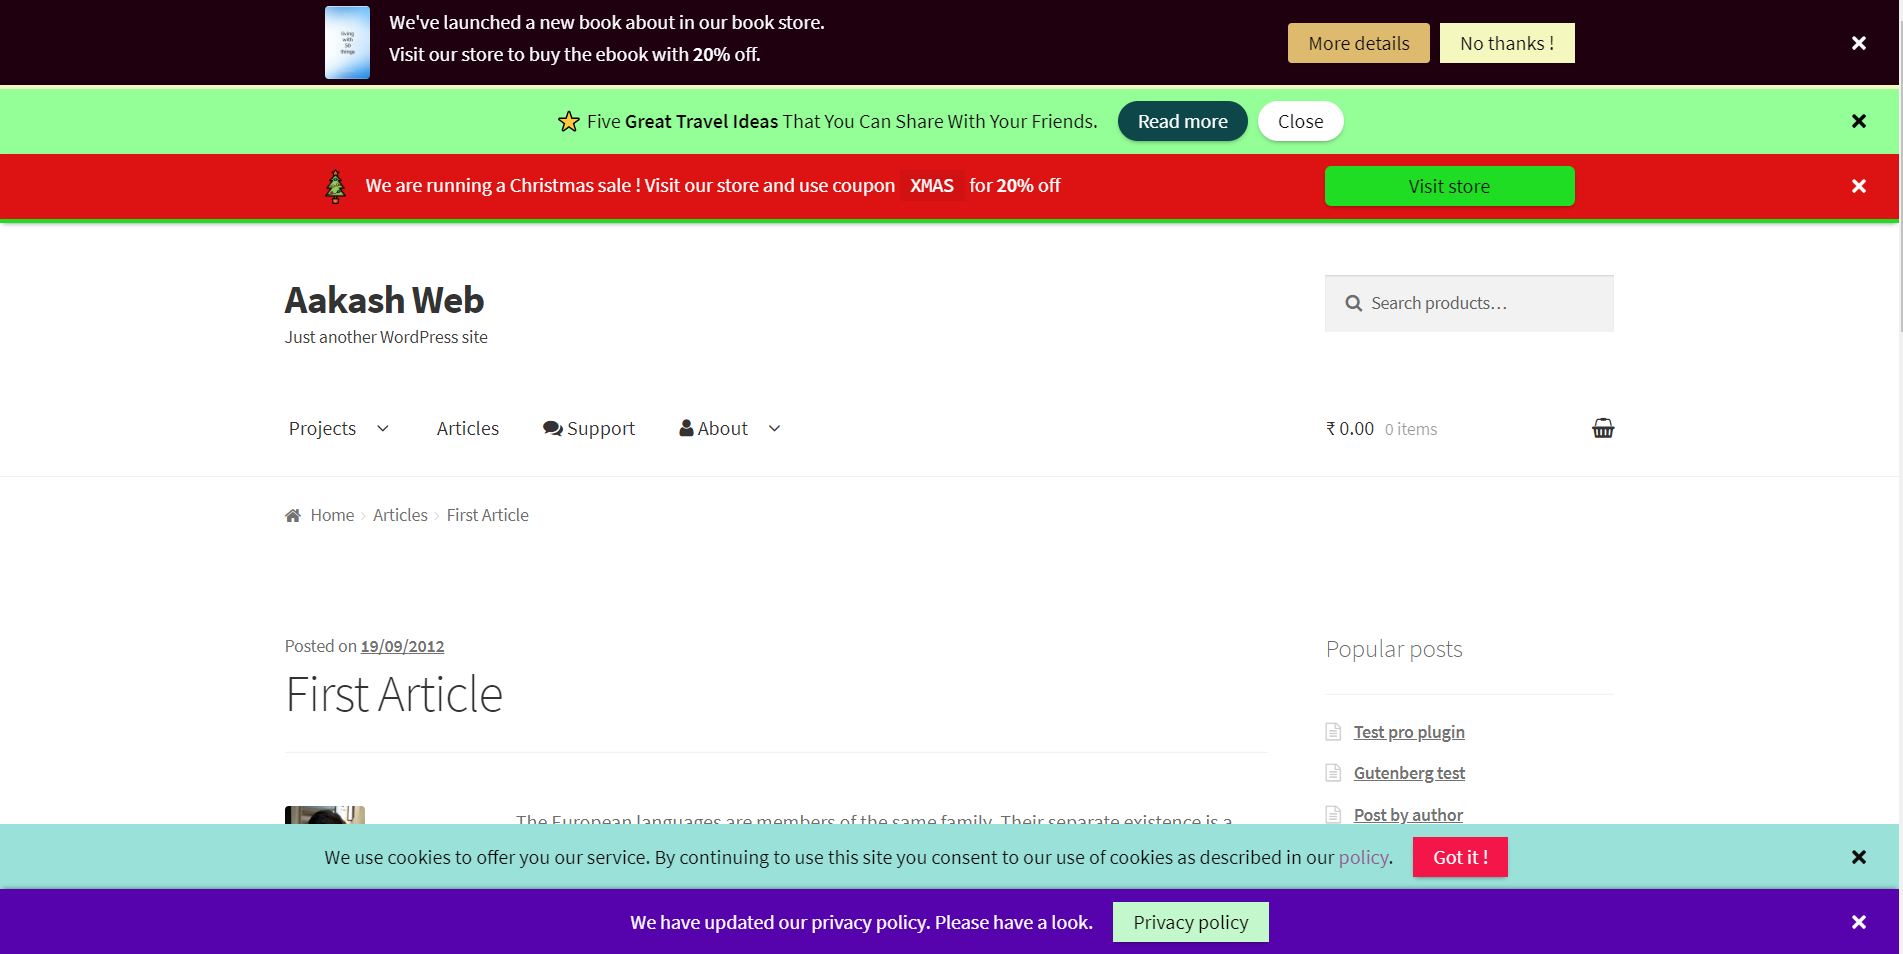
Visit your website and now you can see a sticky message bar added. That’s it! You have now successfully added a sticky message bar.
Can I add Multiple Sticky Bars to My Website?
Yes, you can add multiple sticky bars to your website. The announcer plugin will automatically stack them up.
You can also display some announcements at the top of the page and some at the bottom of the page.
Conclusion
In this article, we added a sticky announcement bar using the Announcer plugin in a few steps.
You can also learn about adding announcement bars and the features you can enable in them to drive sales and increase audience engagement.
If you have any comments to share, please write them in the comments box below.
Add your comment No Comments so far