Do you want to share an announcement or message with your website visitors?
WordPress does not provide any out-of-the-box solution to display announcements. You can however write a blog post and make it stick to the top.
But there are even better ways to easily share announcements. You can simply use a message or announcement bar/banner plugin to show your message.
One of the best plugins to display such announcement messages is Announcer.
In this article, we will see how to use the Announcer plugin to display announcements and messages on your WordPress website.
Why you may want to show announcements on a website?
You may want to display announcements like the below,
- A welcome message.
- Promotional coupons during a seasonal sale.
- Cookie consent message.
- A note about the change in the privacy policy of your website.
- A message about COVID-19 updates.
These are just an idea. There are more reasons why you may need to voice out a message to your visitors.
What is an Announcement bar/banner?
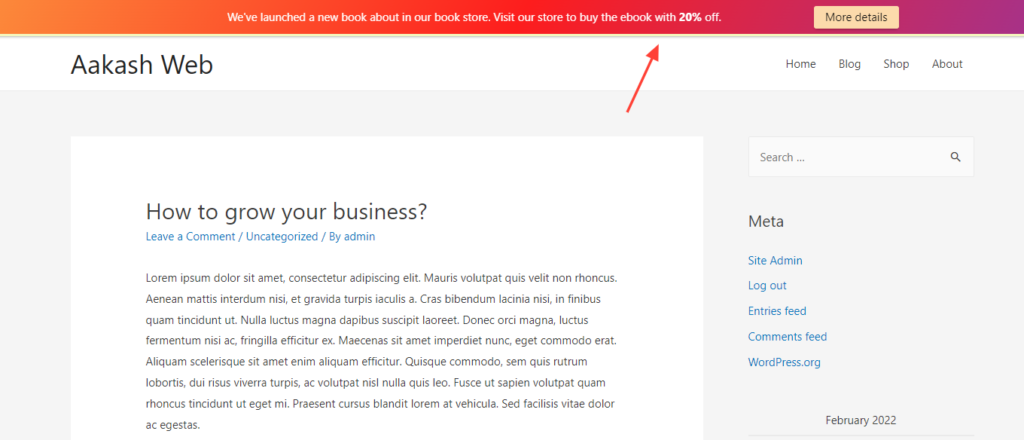
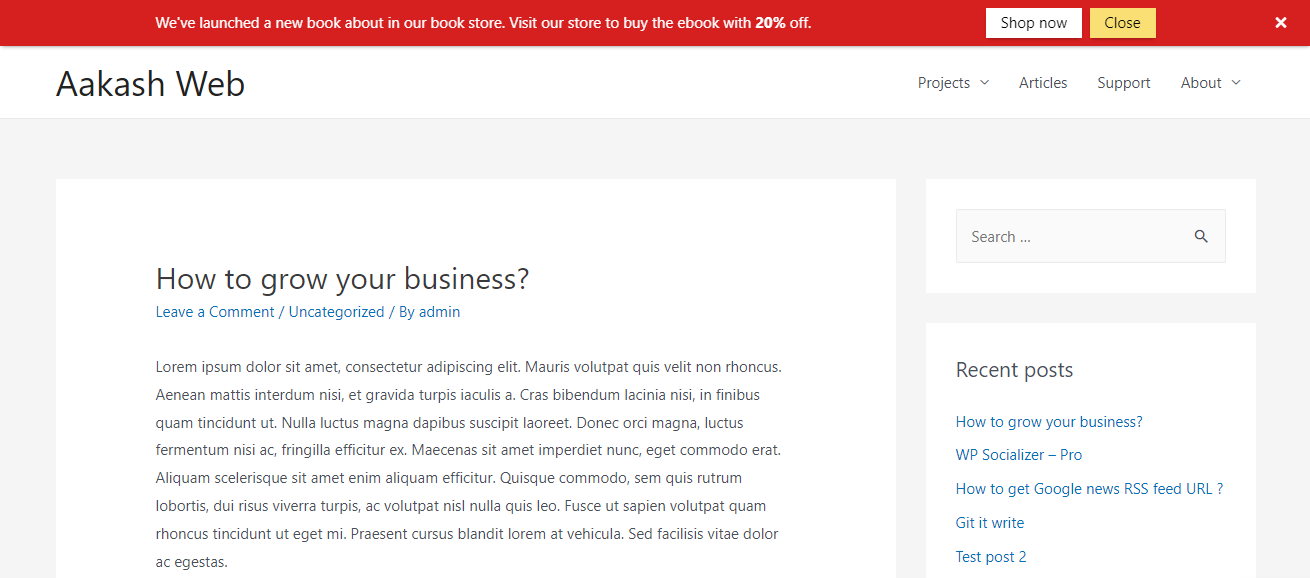
An announcement bar or banner is a sticky/fixed element added at the top or bottom of a page. This is also called the welcome bar, hello bar, notification bar, top bar, or message bar.
These announcement bars can be added to all the pages or to a specific page on your website.
You can add the message you want to convey in these announcement bars. In the image above you can see an announcement added about a new book added to the book store.
Since these messages are seen at the top/bottom they are one of the best and most compact ways to share a message with your audience without any distraction or covering the page.
Getting started
I have mentioned earlier we will be using Announcer WordPress plugin to display announcements. It is one of the free plugins for beautiful-looking free announcements on your website. It is also lightweight on the front end and powerful with features.
It even has a PRO version where there are more features to spice up your announcement bar.
So, let’s get started!
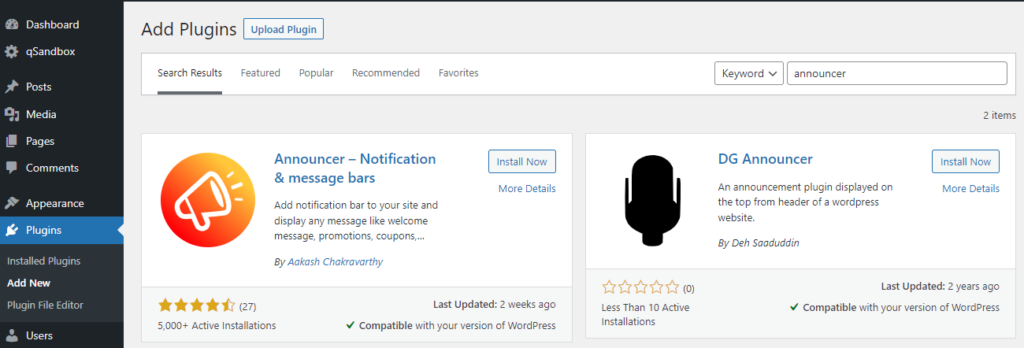
- Head on to your WordPress admin dashboard and go to Plugins > Add new
- Search for “Announcer” in the search box
- Click on “Install Now” to install the plugin.
- After the installation, click on “Activate” to activate the plugin.
Adding the announcement
Now that we have installed the Announcer plugin, let’s start adding the announcements.
- Go to Announcer > All announcements. On this page you can view and edit all the announcements you have created.
- Click “Add announcement” to add your first announcement bar.
- In the Edit announcement page,
- Give a title for the announcement to identify it from the admin view.
- Enter the announcement you would like to make in the textbox below the title. (You can enter any message which contains HTML and shortcodes)
- Click the “Publish” button on the right to publish your announcement.
- That’s it!
- You have added an announcement on your website.
- You can visit your website to see the Announcement at the top of every page.
Adding buttons to the announcement
You have now added an announcement message bar to your page. It is simple but does not have any actionable items i.e. it does not have any button which your visitors can click and act on it.
Let’s add buttons to the announcement.
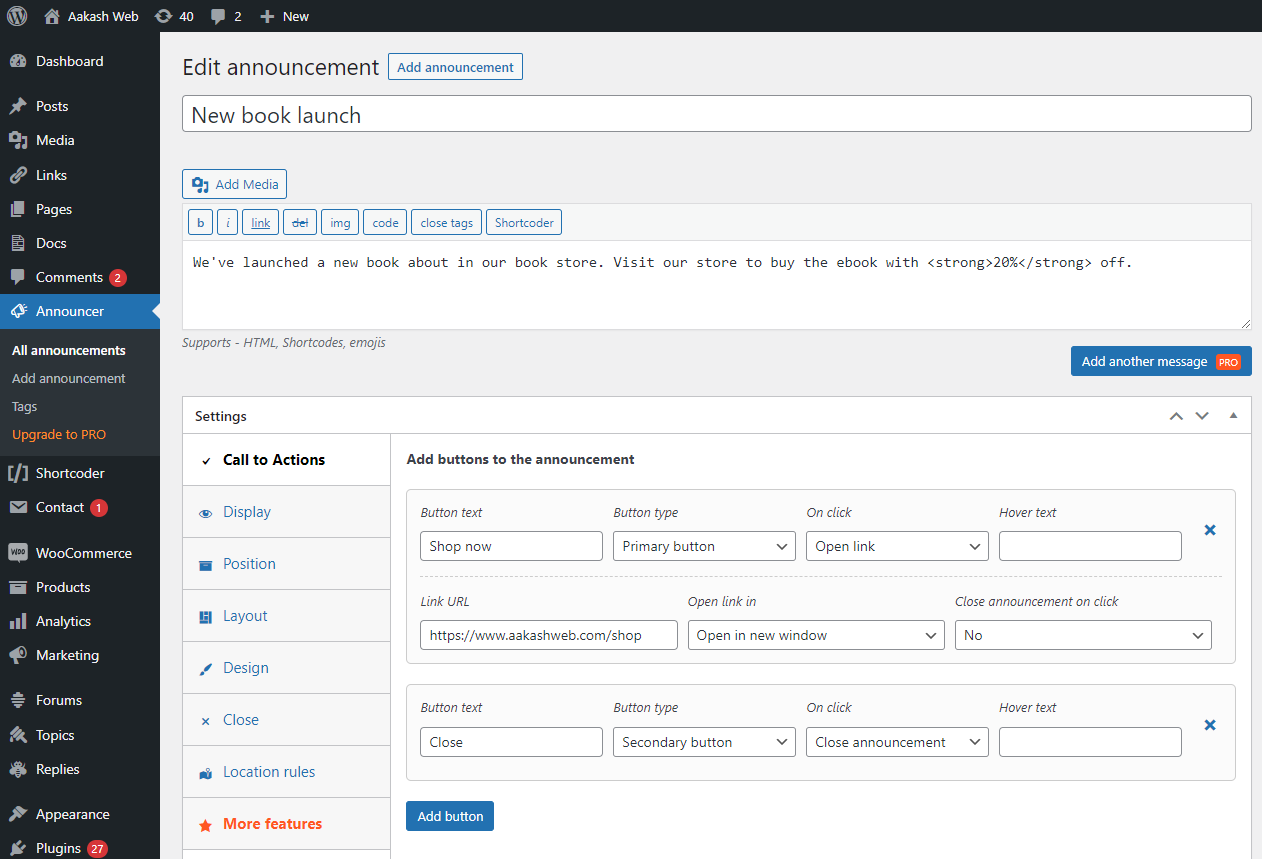
- In the announcement edit page, under the Settings section, select the “Call to actions” tab.
- Click Add button and fill in details like the text, the link URL for the button, type, etc.
- You can add more buttons as required by the announcement.
- Hit Publish and save your announcement.
Now visit your page and you can find the announcement with buttons with which your visitors can interact.
You have successfully added an announcement to your website.
With the Announcer plugin, you can add any number of announcements to your website. They will stack automatically when there is more than one announcement displayed on a page. These announcements are mobile responsive and work well on smaller devices too.
Customizing your announcement bar
Announcer WordPress plugin allows you to easily tweak the announcement bar to match your style and requirements. It has a variety of options to make it as you like.
You can change things like below
- Position of the announcement bar (top/bottom)
- Schedule announcement to display at a later date.
- Display after a specific duration
- The layout of the message and the buttons
- Condition to display on specific posts and pages.
- Colors 🌈, width, font size, and more …
As an example, let’s quickly place the announcement bar at the bottom of the page, change the background color to green and display it only on the home page.
- Go to the Edit announcement page
- Under the Settings section,
- Switch to the Position tab and select “Bottom of the page” for “Position of the announcement“
- Switch to Design > Bar tab. Set a green color as the background color.
- Switch to the Location rules tab and select Show in selected pages. Click Add new rules and select Home page
- Hit Publish to save the settings.
Now visit your page and you can find the announcement in a green bar at the bottom page. Note that it is displayed only on your homepage and not on all posts and pages.
You have now successfully added an announcement to your WordPress website.
You can continue to explore the announcer plugin and play with the various options it provides.
Spicing up
As you tried, with the Announcer free plugin you were able to easily add announcements. You can further spice up with more features in the Announcer PRO version. You can add more features like those below in the PRO version.
- Show multiple messages in one bar
- Add animation
- Display countdown timer
- Target visitors based on certain conditions
- Insert announcements anywhere with shortcodes.
Conclusion
In this article, we were able to add an announcement bar to your WordPress website in just a few steps using the Announcer plugin.
Now it is time to get started and show announcements or greet your visitors 😀
Comment below and share with everyone the announcement you added and the feature you most liked about the Announcer plugin.
If you found this article to be helpful, follow us on Facebook and Twitter, and stay tuned for more tips and guides like this.
Add your comment 1 Comment so far